


Read the instructions carefully before installing the panels
Before installation
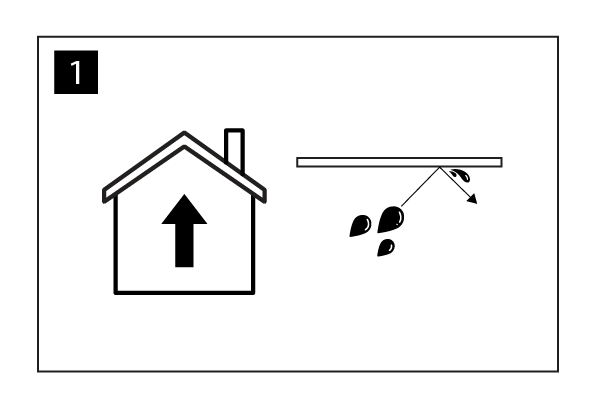
- Note that the interior panels are meant only for indoor use and they must not be in direct contact with moisture.
- Any faults in the materials shall be reported to prior to the installation.
- Interior panels are not suitable to be installed to the ceiling with heating.
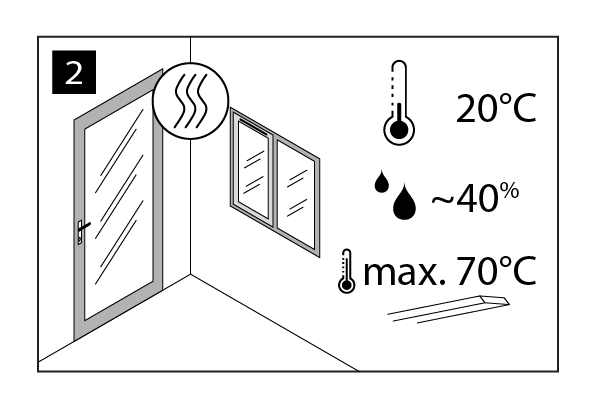
- The interior panel suits only for premises where the room temperature and humidity are normal, approx. 20°C, and the relative humidity is approx. 40%, i.e. the walls and the ceiling of the room shall be dry with window glasses.
- Interior panels should not be exposed to continuous temperatures of over 70°C.
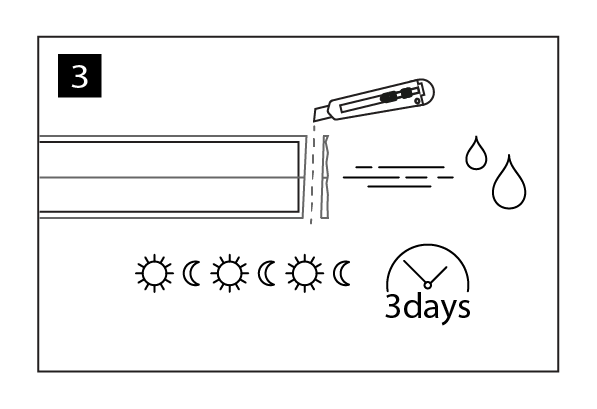
- The temperature and humidity of the interior panels shall be let to stabilise to the same temperature and humidity with the installation environment for three days before the installation.
- There is no need to open the packages completely, it is enough that you make a hole to the ends of the packages from where the humidity can be removed.
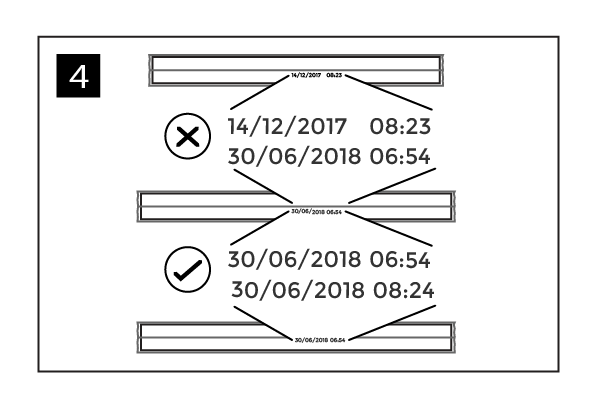
- Large surfaces should be made of the same production batch. The batch number can be found on the bottom interior panel of the package.
Background
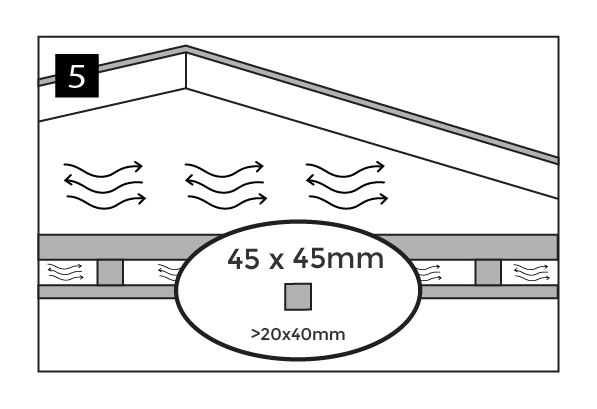
- The recommended size for the joists is 45×45 mm, with a minimum of 20×40 mm.
- Make sure that there is sufficient air circulation behind the panels. If necessary, remove the bottom panels or attach reverse panels.
- Make sure that the bottom panels are straight, even if the ceiling is uneven.
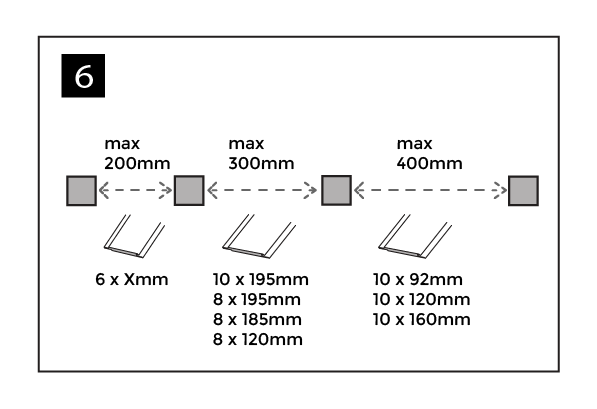
- The distance between the joists should be approx. 300 mm or less, so the ceiling does not begin to ‘slouch’. For 10×92, 10×120 and 10×160 panels max. 400 mm. For 6mm thick panels the distance between the joists can be max. 200mm.

- 315 mm wide panels must be installed parallel to the joists.
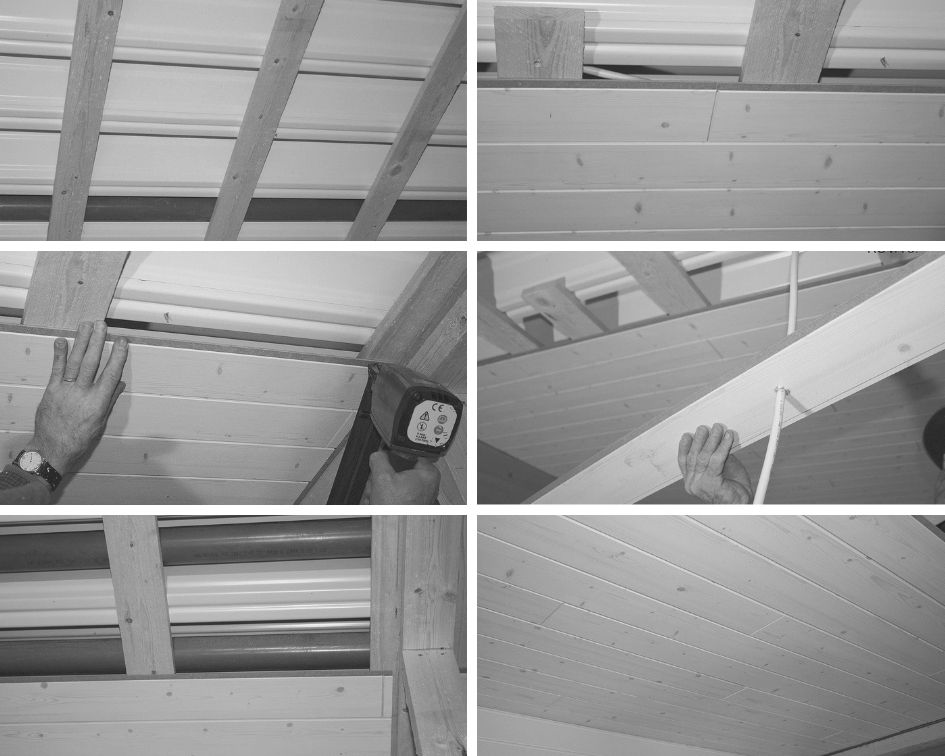
Installation
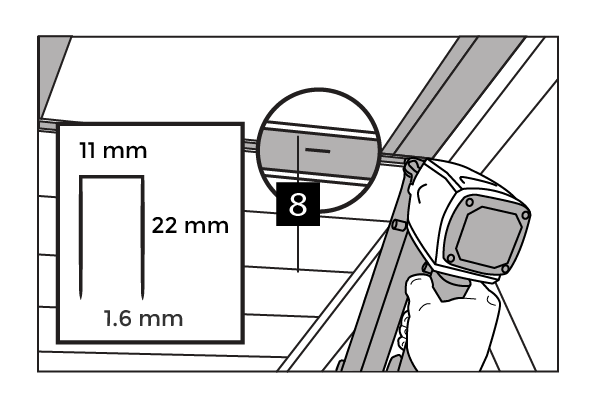
- We recommend that you install the panels by using a stapling gun that is operated by compressed air. Use a staple that is at least 22 mm long, 11 mm wide and 1.2 mm thick.
- Shoot the staple diagonally into the long, protruding lower lip of the groove.
- To make installation of the panels possible, the staple must remain flush with the groove. The staple must not sink deep inside the groove, because then the panel will not be fastened properly.

- Leave at least 12 mm expansion gap between wall and the panels. If the slope exceeds the length or width of 6 meters, is expansion gap added 2 mm per exceeded meter. The joint will be covered with universal / ceiling molding.
- You can affect the appearance of the ceiling by the way you position the seams of the grooves. You can make patterns in your ceiling by alternating the location of the end seams.
Safety
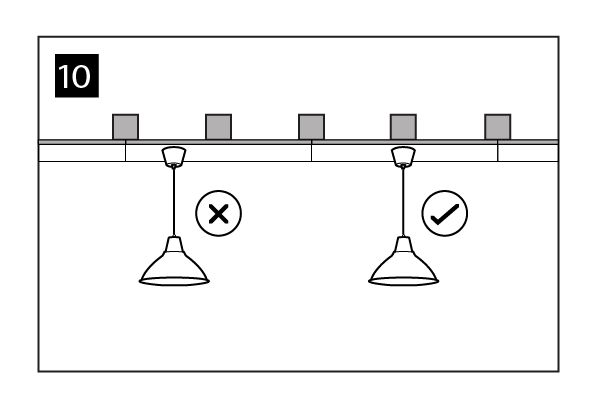
- Do not attach any light fittings or other heavy objects to the panel – instead, they should be attached directly to the mounting base.
- Please note the lighting manufacturer’s installation instructions concerning the temperature.
Maler Oy shall replace a faulty product with a new equivalent product or up to the price of the defective product.
Maler Oy is not responsible for indirect costs.