


Read the instructions carefully before the installation of the interior wall panels
Before installation
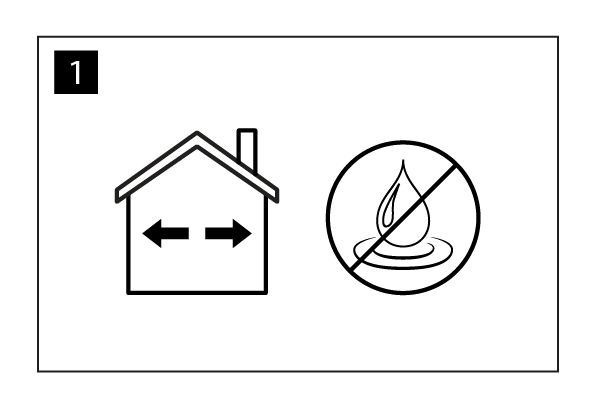
- Note that the interior panels are meant only for indoor use and they must not be in direct contact with moisture.
- Interior wall panels are not suitable to be installed to the ceiling.
- Any faults in the materials shall be reported to prior to the installation.
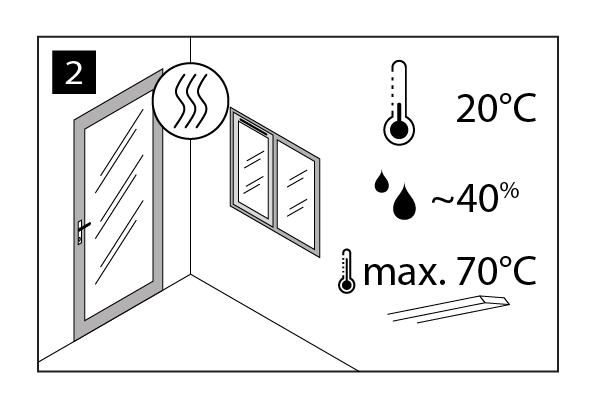
- The interior panel suits only for premises where the room temperature and humidity are normal, approx. 20°C, and the relative humidity is approx. 40%, i.e. the walls and the ceiling of the room shall be dry with window glasses and doors installed.
- Interior panels should not be exposed to continuous temperatures of over 70°C.
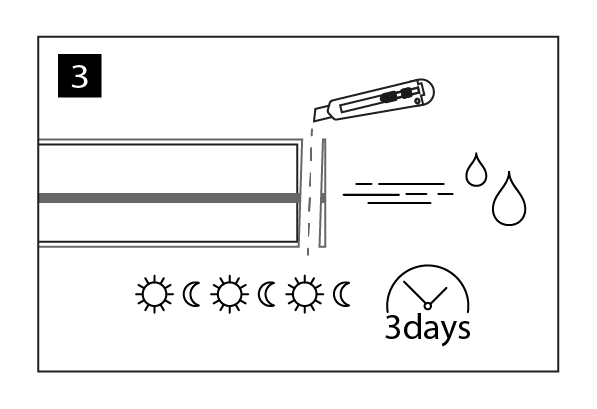
- The temperature and humidity of the interior panels shall be let to stabilise to the same temperature and humidity with the installation environment for three days before the installation. The packaging does not have to be totally removed. It is enough that you make a hole to the ends of the packages from where the humidity can be removed.
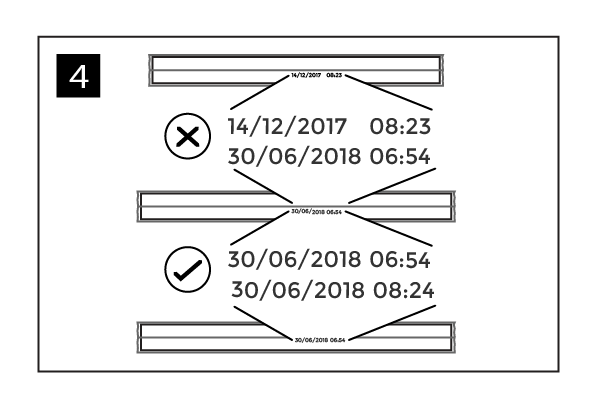
- Large surfaces should be made of the same production batch. The batch number can be found on the bottom interior panel of the package.
Installation
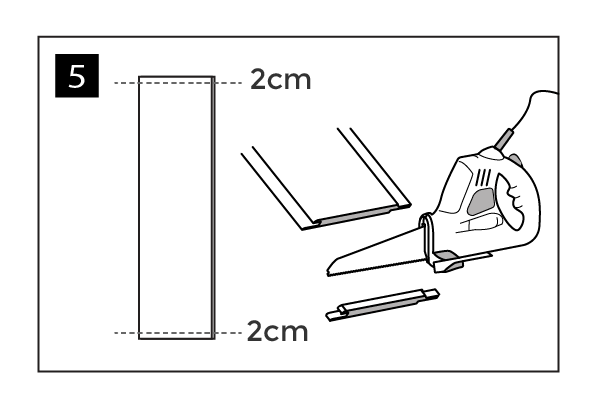
- The product is oversized, which allows a small tear in the film surface and skew (2 cm) within the dimension. Sawing the end cuts of the product, you make a successful installation and a sleek finish.
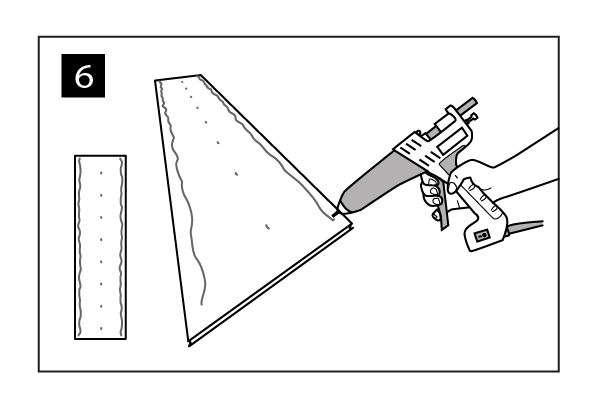
- Make a continuous stripe of glue to the both long sides of the panel and spots of glue to the middle of the panel.
- Check the suitability of the glue used with the glue manufacturer.
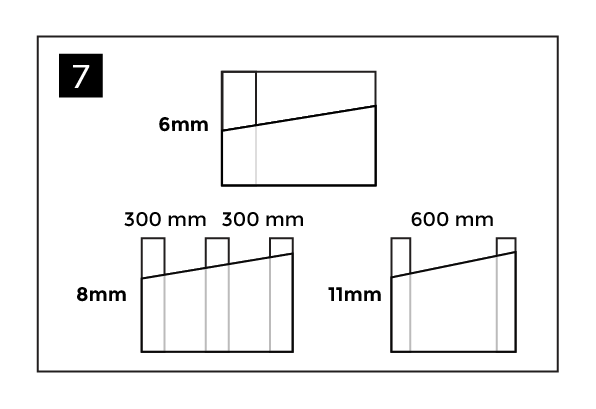
- The interior wall panels can be attached to plasterboard or directly to the old surface. Make sure the sufficient fastening of the bottom surface.
- 8mm interior wall panels can also be attached directly to the top of the supporting rails if the distance from centre to centre is 300mm.
- Interior wall panels must be installed parallel to the joists.
- To facilitate the installation, bring the board slightly over the already installed board. Pull the board backwards until the boards are at the same level, and push in to the tongue and groove joint.
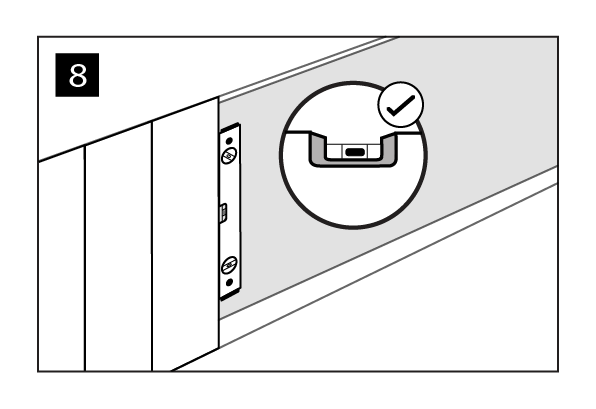
- Using a spirit level the panels can be installed straight. Installing the first panel straight is important to make the installation progress correctly.
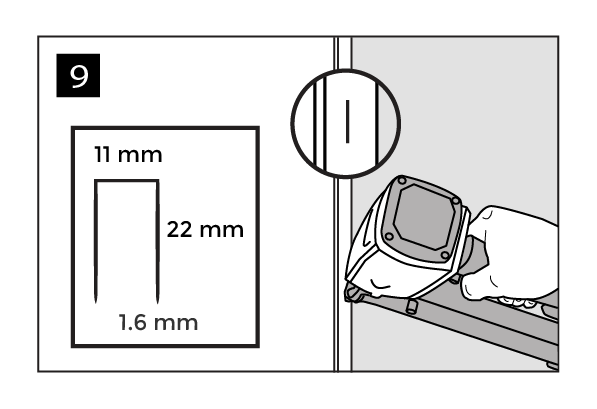
- Tongued and grooved wall panels are attached with a staple gun. The distance between the staples should be approx. 300 mm. Secure the fastening by gluing the panel according to the instructions.
- Use at least a 22 mm long, 11 mm wide and 1,6 mm thick staples. The staple is shot diagonally to the lower intruding tongue of the female groove.
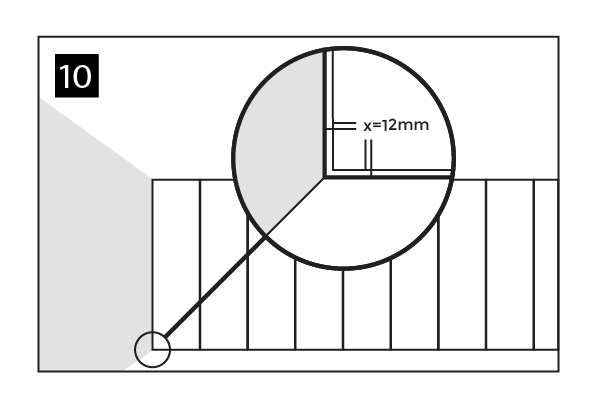
- Leave a minimum expansion room of 12 mm between the interior panels and the wall or some other surface limited to the panel. If the length or the width of the face is over 6 metres, add 2 mm of the expansion space for each extra metre.
- The wall sockets can be be raised to the same level with the wall surface with a heightening ring.
- The seam is covered by ceiling mouldings, baseboards and universal moldings.
Maler Oy shall replace a faulty product with a new equivalent product or up to the price of the defective product.
Maler Oy is not responsible for indirect costs.