Finished result using Maler attachment clips
Before Installation
Maler attachment clips is targeted for baseboards with attachment groove. The attachment clip folds for both inner and outer corners. You can, of course, install baseboards also traditionally with nails or screws. General installation instructions of baseboards can be found here.

Installation instruction
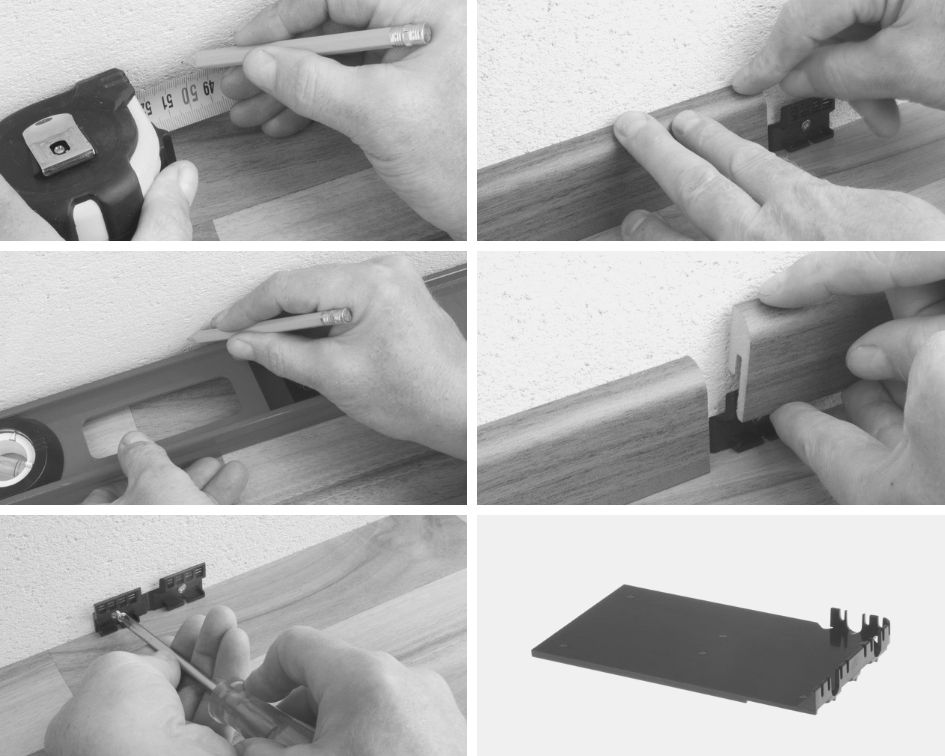
- Attach fast attachment clips about 50 cm apart from each other. If the wall has curvature, mark the deepest points of the wall for fasteners using a darby float or spirit.
- Take into account the details of the mouldings and room corners so that each connection point has a fast attachment clip. The connecting, mitre and end pieces should also be attached with fast attachment clips.
- Cut the baseboards of one wall/room to the dimensions you need. Also take into account the space needed by the connecting, mitre and end pieces (the installation instructions can be found in the packages of these products).
- The installation board is used as is in the installation of 42 mm and lower baseboards. For baseboards higher than 42 mm, use an additional platform piece. Yli 42 mm korkeilla listoilla käytetään lisäksi korokekappaletta.
- Press the fast attachment clips to that end of the installation board where the grooves are. The fast attachment clip fits into place so that the clip holes meet the openings.
- Secure the fast attachment clips in the places you marked on the wall. Use Maler screws for board walls and for stone walls use Maler nail anchors.
- Remove the installation board and place the next fast attachment clip in it.
- Press the baseboard top-down to the fast attachment clip.